10. HomeGroup
Today, you may have a network in your home that you use to share an internet connection. But it can be hard to share other things, like files and printers. Do you have one or more computers in your home but only one printer? If you’re like most people, when you need to print a file that’s on your laptop in your bedroom on the printer in your den, you probably e-mail the file from one PC to another or transfer it on a USB drive. And if you need to find a file but don’t know which computer it’s stored on, chances are you’re in for a long night as you traipse from PC to PC and search each one.
HomeGroup, a new feature in Windows 7, makes connecting the computers in your home a painless process. HomeGroup is set up automatically when you add the first PC running Windows 7 to your home network. Adding more PCs running Windows 7 to the HomeGroup is an easy process. You can specify exactly what you want to share from each PC with all the PCs in the HomeGroup. Then, sharing files across the various PCs in your home—and many other devices—is as easy as if all your data were on a single hard drive. So you can store digital photos on a computer in your den and easily access them from a laptop anywhere in your home. Similarly, once in a HomeGroup, the printer in your den is shared automatically with all of the PCs in your home.

9. Touch
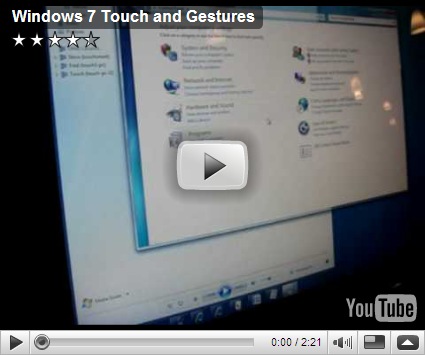
While great for a lot of tasks, using a keyboard and mouse is not always the easiest way to do things. With Windows 7, if you've got a touch-screen monitor, you can just touch your computer screen for a more direct and natural way to work. Use your fingers to scroll, resize windows, play media, and pan and zoom.
The Start menu, Windows Taskbar, and Windows Explorer are touch-friendly, with larger icons that are easier to select with your finger. Browsing the web with Internet Explorer 8 is easier too—just use your finger to scroll down a Web page or browse your favorite links. You can even use your finger to arrange the pictures in a photo album.
Windows 7 also introduces support for new multi-touch technology, so you can control what happens on the screen with more than one finger. For example, you can zoom in on an image by moving two fingers closer together, like you're pinching something, or zoom out by moving two fingers apart. You can rotate an image on the screen by rotating one finger around another, and can right-click by holding one finger on your target and tapping the screen with a second finger.
8. Jumplists
Windows 7 is focused on keeping the things you use most right in front of you. One example: The new Jump List feature. It's a handy way to quickly reach the files you've been working with. To see the files you've used recently, just right click on the icon on your taskbar. So right-clicking on the Word icon will show your most recent Word documents. Plus, if there are other files you want to keep handy, you can just pin them to the Jump List so they’ll always appear. That way, the documents you’re likely to want are just a couple clicks away.

Some programs, such as Windows Media Player, can pre-populate their Jump Lists with common tasks. For example, on the Jump List for Windows Media Player, you’ll see options to Play All Music or resume your last playlist. On the Jump List for Internet Explorer, you’ll see frequently and recently viewed websites. With some programs, you’ll even have quick access to tasks that, in the past, were only available from within the program, such as composing a new e-mail message.
7. Aero Snap
With Windows 7, it’s easier to do things you do all of the time. For example, before, when you wanted to compare two open windows, you had to manually resize your open windows to show them side by side. With Snaps, you can simply grab a window and pull it to either side edge of the screen to fill half the screen. Snap windows to both sides, and it’s easier than ever to compare those windows.

6. Aero Peek
Another thing you may want to do is quickly see your gadgets or grab a file from your desktop. To see your desktop just move your mouse to the lower right corner of your desktop. That'll make all the open Windows transparent—so your desktop is immediately visible. Want to get all but one window out of your way? Grab the top of that window, shake it and all the other open windows will minimize to the taskbar. Shake the window again, and they’ll all come back.

5. Windows Search
Looking for something on your PC? What’s your first instinct? If you use the web a lot, you probably start by looking around for a search box. Now, you can find things on your computer the same way. Introduced with Windows Vista, Windows Search helps you find virtually anything on your PC quickly and easily. Windows 7 also makes search results more relevant and easier to understand.
Looking for a file, e-mail, or application? While you can easily look through folders and menus, there’s an even faster way. Just click on the Start button and you’ll see a search box at the bottom of the Start menu. Just enter a word or few letters in the name or file you want, and you’ll get an organized list of results.
Windows 7 uses libraries to show all content of a particular type in one spot. Say you’ve got photos in several locations on your PC. A lot will be in your Photos folder. But you might have some in documents folders too. Your photos library makes it easy for you to browse and use all your photos, no matter where they are on your PC.
By collecting things into a single view, libraries make it simpler to find what you’re looking for. They’re even more powerful with Windows Search. You can search your Libraries using filters to customize your search. For example, when you’re looking for music you can search by album. Or search for photos by the date they were taken. You can go to your Documents Library, click on authors, and see all the documents on your computer sorted by author name.
4. Device Stage
One of the great things about PCs is how they let us use such a wide array of devices. In the past, you had to use several different programs to manage different types of devices. But With Windows 7, you'll use a single Devices and Printers screen to connect, manage, and use whatever printers, phones, and other devices you have on-hand.

A new technology in Windows 7 called Device Stage takes device management a step further. Device Stage helps you interact with any compatible device connected to your computer. From Device Stage you can see device status and run common tasks from a single window. There are even pictures of the devices which makes it really easy to see what's there. Device manufacturers can customize Device Stage. For example, if your camera manufacturer offers a custom version of Device Stage, then when you plug your camera into your PC, you could see things like the number of photos on your camera and links to helpful information.
3. Power Management Improvements
Microsoft designed Windows 7 to improve battery life by adding power-saving enhancements,such as adaptive display brightness, which dims the display if you haven't used your PC for a while. Other improvements include using less power to play DVDs (handy on a trip) and using processing power more efficiently.

2. Reduced interruptions
In previous versions, Windows was often able to tell you when something on your computer needed attention. Unfortunately, it often did so by interrupting you with pop-ups or other messages. These were helpful if the problem required immediate attention. However, they were less helpful if the problem was not urgent and you didn’t want to take care of it at the time.
Rather than popping up with a message in the lower right of your screen, if Windows 7 needs your attention, you'll see an Action Center icon and can find out more by clicking it. If you don't have time to look at the alert immediately, Action Center will keep the information waiting for you to address later.

Action Center will keep the information waiting for you to address later
Windows 7 helps you solve more problems, and it helps you solve them on your own schedule. The Action Center is a new, integrated Control Panel experience that gives you a central place to go for tasks and notifications associated with keeping your computer running smoothly. It makes it easier for you to fix problems yourself by providing a new streamlined experience for addressing notifications and managing computer issues.


Simplifying maintenance, quieting the system: Action Center consolidates notifications
1. New Taskbar
The taskbar at the bottom of your screen is what you use to launch programs and switch between them when they're open. In Windows 7 you can pin any program to the taskbar so it’s always just a click away, and you can rearrange the icons on the taskbar just by clicking and dragging. Microsoft’s made the icons considerably bigger, too, so they’re easier to use. Hover over the icons and you’ll see thumbnails of every file or window that open in that program, and if you hover over the thumbnail, you’ll see a full-screen preview of that window. Move the cursor off the thumbnail and the full-screen preview disappears.
![Windows%20Taskbar%20Previews[1]](https://blogger.googleusercontent.com/img/b/R29vZ2xl/AVvXsEh40NPen2qMYtHBNoCD3mtq8rerW74PnVFW2sHuyZUS5f_EG-skQdmlJQe6oYSxu8TmBExkhH0CFjFgPK-JP6tE_H-OQaEuIinbG9hBPg-RMfDamM_yQ76DO5z480OrzTI1DNuIk3TVzTBP/?imgmax=800 "Windows%20Taskbar%20Previews[1]")


![Windows%20Taskbar%20Previews[1]](https://blogger.googleusercontent.com/img/b/R29vZ2xl/AVvXsEimUbDTJILS836M770Bb8n6QPLeN_z8csLBgP2L9dNnikgoIojQw0E8wqTXOUlxRmYFNOq7EG3l5865hEw6pQmWZr0sb2Rz8ZozUZEC52a5BUgaTpli4ym-a-jL3eMgImq5IVVB0WuOl_Jd/s1600-h/Windows%20Taskbar%20Previews%5B1%5D%5B4%5D.png "Windows%20Taskbar%20Previews[1]")
 The United States Military is currently in the process of upgrading hundred of thousands of their PC’s to the latest version of Windows, Windows Vista.


 Posts
Posts


